Integration Tasks
Integration tasks allow you to configure jobs on each Integration Agent that you installed. You can link multiple Integration tasks on a single Integration Agent. This task allows you to specify the different parameters used to load data into our APIs, such as database connection strings, file name patterns, queries, etc. This Integration tasks will also allow you to specify which Source Connection you want to feed, and thus indicate in which target connection you want to feed this data.
This article only explains how to create a Integration tasks. In order to load data into our applications, more configuration is necessary. For more information, please refer to this article.
In order to view and configure Integration tasks in QuartzIQ, you must have the required application roles:
- QX-Admin
- IQ-Admin (only if you want to create Source and Target Connections in order to input data for QuartzIQ)
[View all Integration tasks](./Integration tasks#view-all-job-configurations) [Modify an existing Integration tasks](./Integration tasks#modify-an-existing-job-configuration) [Create a new Integration tasks](./Integration tasks#create-a-new-job-configuration)
View all Integration tasks
Navigate through the side menu in QuartzAdmin and select Data Integration > Integration tasks. You should now see a list of all Integration tasks already configured in the application. You can also use filters to find a specific Integration tasks or use the search bar to search by name.
Integration tasks list
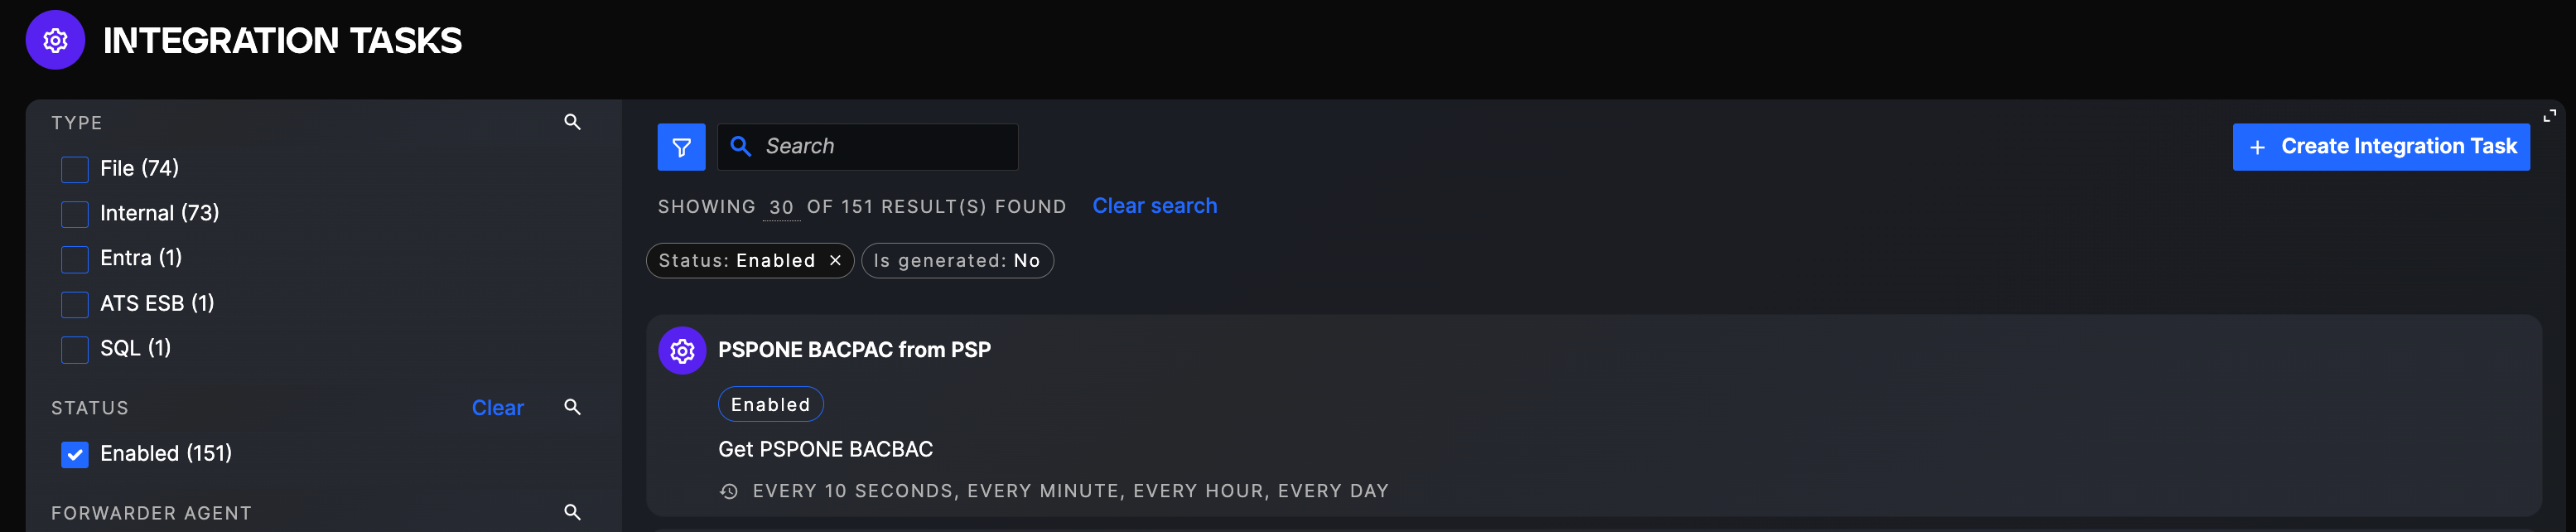
You can click then on any Integration tasks to see its' configuration details.
Integration tasks details

You can see the general information of the Integration tasks, its' technical information as well as the Integration Agent used by this Integration tasks and the Source Connection and Target Connections that this Job is loading data into.
Modify an existing Integration tasks
In order to modify an existing Integration tasks, you can navigate to the Integration tasks using the method described in the section above. Once on the page, you must switch the Integration tasks to "Draft" status in order to be able to modify it.
Switching the Integration tasks to Draft mode will disable its execution until it is switched back to Enabled.
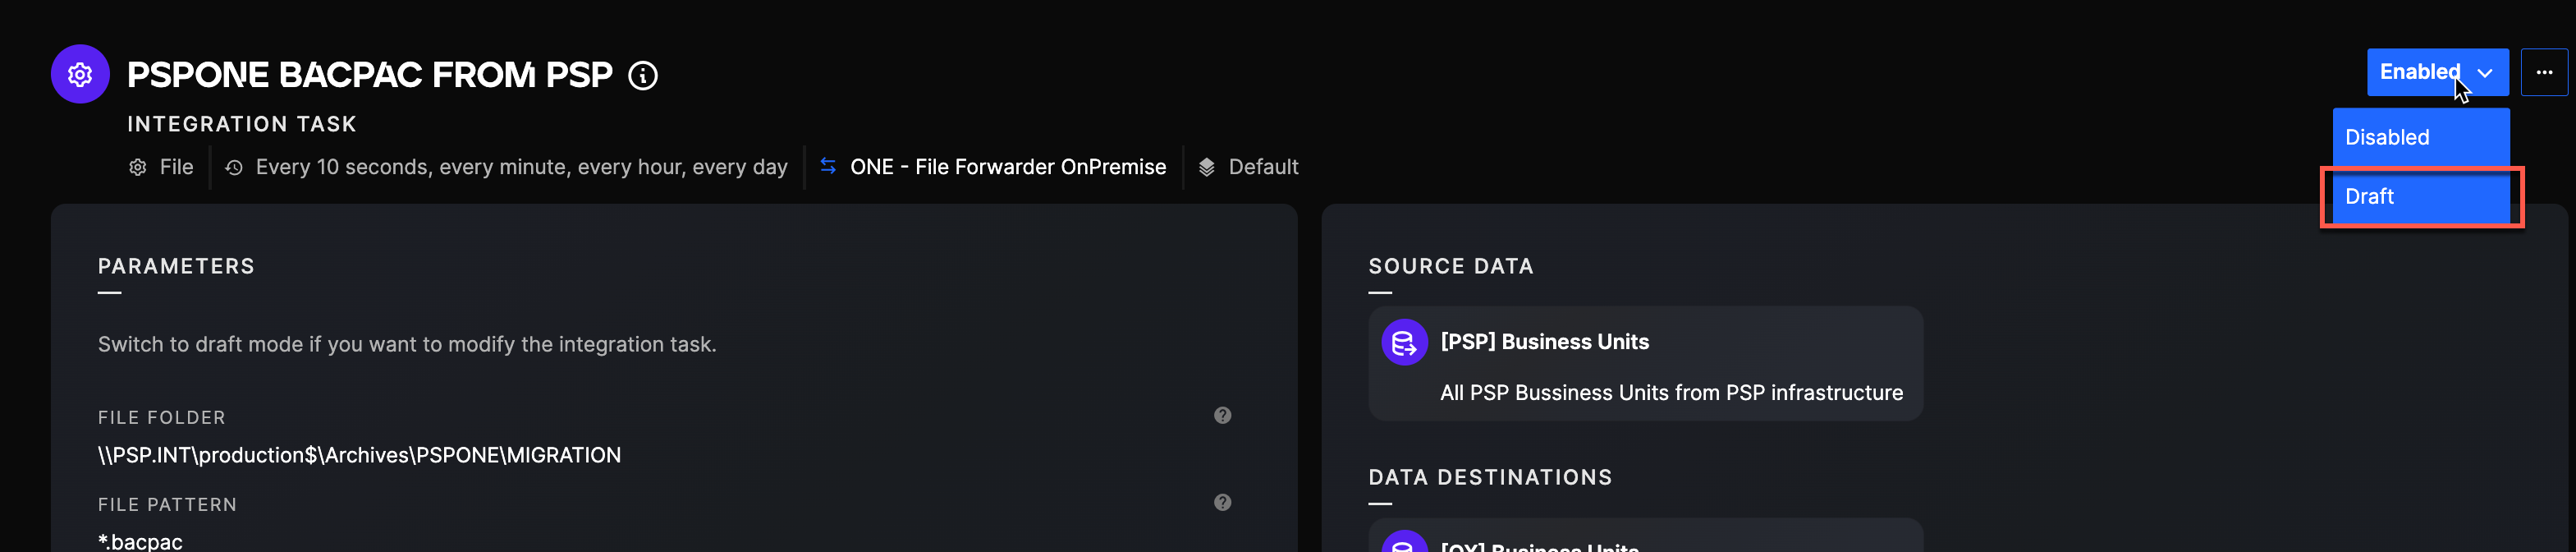
You can easily change its general information, scheduling and dataloading queue using the Edit General Information menu. You can also change its technical parameters directly in the page.
Create a new Integration tasks
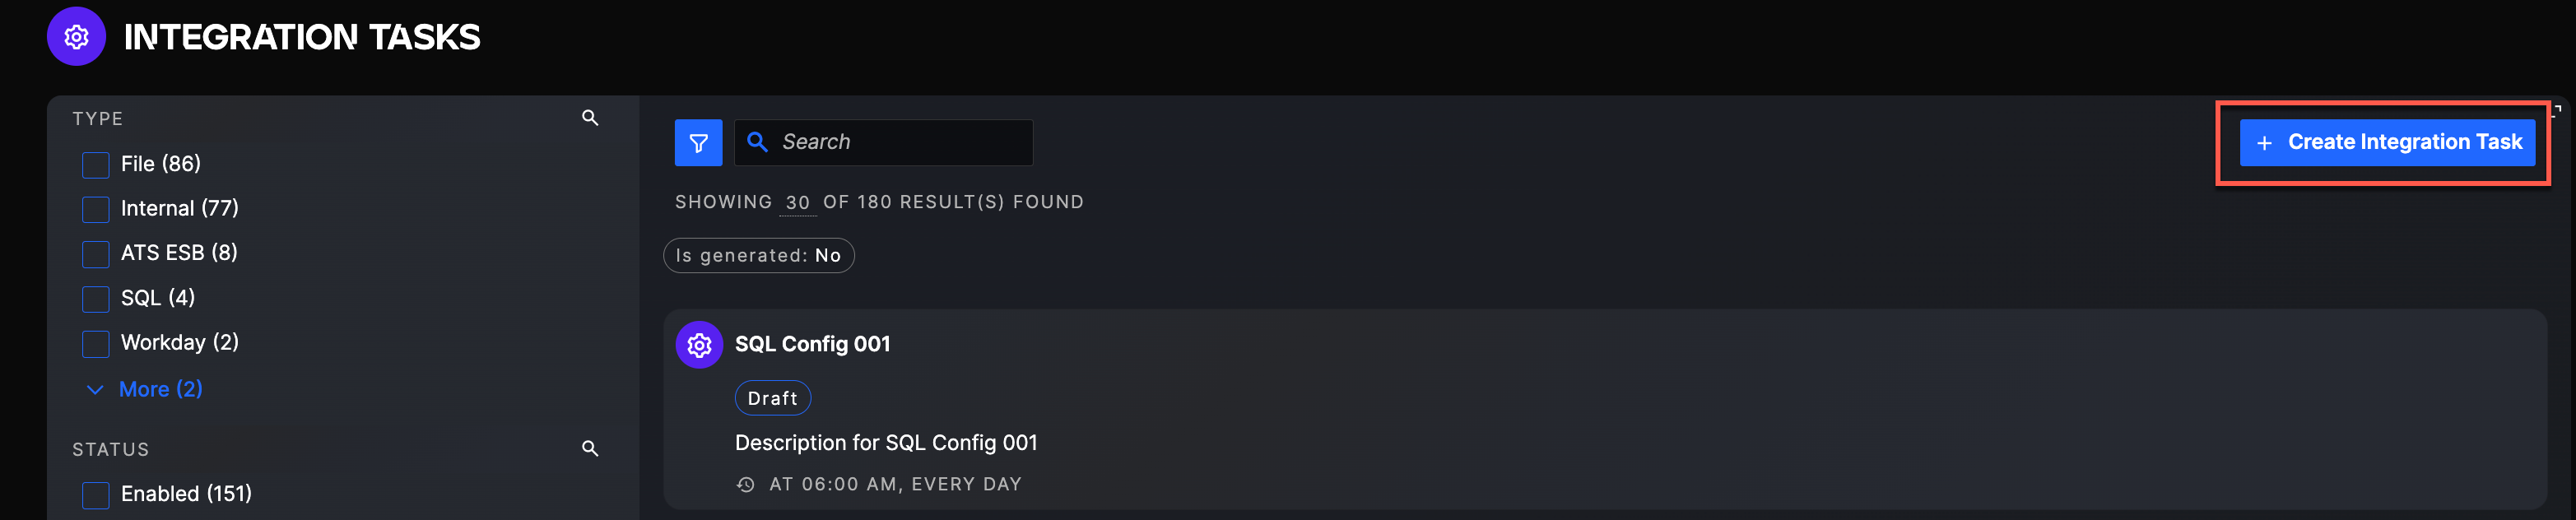
In order to create a new Integration tasks, you can click on the Create Integration tasks button in the Integration tasks section.
Create Integration tasks button
The creation button will take you through the steps necessary to create the Integration tasks:
- General: this step allows you to configure the name and description of the Integration tasks. This will help you identify the Integration tasks but can easily be updated after creation.
- Integration Agent: this step allows you to specify the Integration agent that will be executing the job.
- Execution Frequency: in this step, you can specify on which frequency the Integration Agent will check if new data is available to be loaded.
- Source Connection: in this step, you must finally specify the source connection that will be fed by the job.
- Loading Queue: in this step, you can specify the dataloading queue in which you want to execute the job. There is a total of 10 queues that can load data simultaneously. By default, it will be set to a default queue.
Once created, the Integration tasks will be in Draft mode. This allows you to modify the Integration tasks and set the technical parameters. Each technical parameter has a name and description, and some of them are mandatory.
Integration tasks Parameters
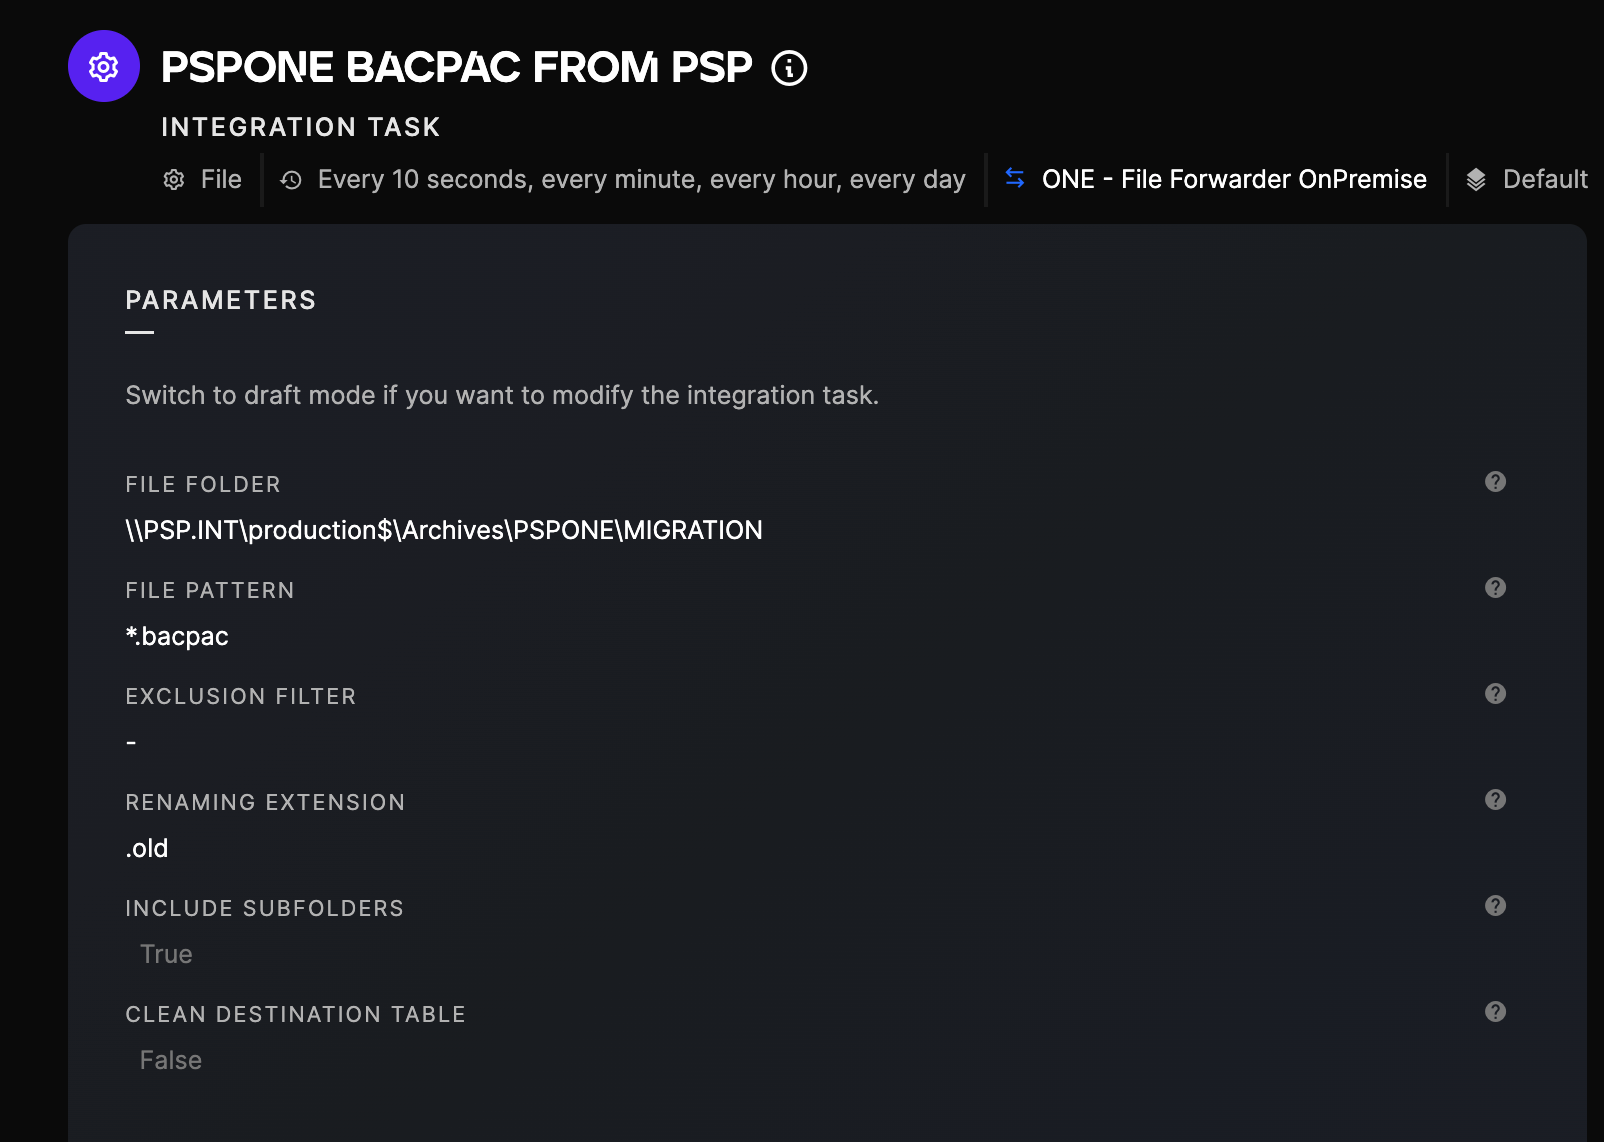
When switching the Integration tasks to Enabled, a verification is done on the parameters to ensure that the Integration tasks has all mandatory parameters to execute correctly.